Adding Entity Framework Core and SQLite
Building upon our introduction to Minimal APIs, let's proceed to the next level by incorporating a data source to store and retrieve recipe information. We'll be using SQLite as our database and Entity Framework Core to interact with it.
To get started, we'll need to add some packages that will allow us to interact with SQLite and EF Core. In your terminal, navigate to the root directory of your project and run the following command to install the required packages:
dotnet add package Microsoft.EntityFrameworkCore.Sqlite
dotnet add package Microsoft.EntityFrameworkCore.Design
These packages are necessary for working with SQLite and Entity Framework Core.
Now that we have added our packages, we will need to add our recipe model. Create a new folder named Models in your project directory. Inside the Models folder, add a new class file called Recipe.cs. Open the Recipe.cs file and define the recipe model as follows:
namespace CookingAPI;

public class Recipe
{
    public int Id { get; set; }
    public string Name { get; set; }
    public string Description { get; set; }
}
We have added our Recipe model which is a representation of the data and business logic of our application. Since we have our model set up, we need to configure EF Core.
The next step is to create our Recipe DbContext which represents a session with the database and acts as a bridge between our application code and the database. If you want to know more the DbContext, you can checkout this for more details.
Let's proceed by adding a folder called Data under our project directory. Inside the Data folder, add a new class file called AppDbContext.cs (You can give it any other name, by convention many .NET developers like to call it AppDbContext). Open the AppDbContext.cs file and define the database context as follows:
using Microsoft.EntityFrameworkCore;

namespace CookingAPI.Data;

public class AppDbContext: DbContext
{
    public AppDbContext(DbContextOptions<AppDbContext> options): base(options)
    {
    }
    public DbSet<Recipe> Recipes { get; set; }
}
Now, it's time to create a vital link between our API and the SQLite database. To achieve this, let's dive into the Program.cs file in your preferred code editor or IDE. Add the following code snippet just below the builder variable:
using CookingAPI.Data;
using Microsoft.EntityFrameworkCore;

var builder = WebApplication.CreateBuilder(args);

builder.Services.AddDbContext<AppDbContext>(options =>
{
    options.UseSqlite(builder.Configuration.GetConnectionString("DefaultConnection"));
});

var app = builder.Build();

app.Run();
You will notice that we have added our EF core configuration and it points to a connection string called DefaultConnection that we will have to set in our appsettings.json file under our project directory(This file was scaffolded automatically when we created our project). We have also imported the Microsoft.EntityFrameworkCore which is vital when working with EF Core.
Our connection string will point to the appsettings.json looking for DefaultConnection which we do not have yet. Open appsettings.json and add a section for the connection string as follow:
    {
  "Logging": {
    "LogLevel": {
      "Default": "Information",
      "Microsoft.AspNetCore": "Warning"
    }
  },
  "AllowedHosts": "*",
  "ConnectionStrings": {
    "DefaultConnection": "Data Source=./Data/app.db"
  }
}
We have added a section below "AllowedHosts": "*" called ConnectionStrings having DefaultConnection which is the connection string pointing to our SQLite db. The app.db will hold our data and will be located under Data folder under our project directory.
Next, we need to create a migration for our Recipe model. EF Core migrations allow us to manage changes to the database schema. Run the following command in your terminal:
dotnet ef migrations add InitialCreate
This command creates a new migration that will create the Recipes table corresponding to our Recipe model. To apply this migration and create the database schema, run the following command:
dotnet ef database update
After applying the migration, we can proceed to seed the database with some initial data. Let's update our AppDbContext to seed the database. Here's how you could modify the AppDbContext class to seed the Recipes table with a few initial recipes:
using Microsoft.EntityFrameworkCore;

namespace CookingAPI.Data;

public class AppDbContext: DbContext
{
    public AppDbContext(DbContextOptions<AppDbContext> options): base(options)
    {
    }
    public DbSet<Recipe> Recipes { get; set; }
}

protected override void OnModelCreating(ModelBuilder modelBuilder)
{
    modelBuilder.Entity<Recipe>().HasData(
        new Recipe { Id = 1, Name = "Somba wali", Description = "Sweet and common meal eaten in the Central Africa." },
        new Recipe { Id = 2, Name = "Wali Maharagwe", Description = "Rice and beans mostly in the Central African cuisine" }
    );
}
Finally, let's define some API endpoints for creating, retrieving, updating, and deleting recipes. Below is a basic way of how you can create these endpoints:
using CookingAPI.Data;
using CookingAPI.Models;
using Microsoft.EntityFrameworkCore;

var builder = WebApplication.CreateBuilder(args);

builder.Services.AddDbContext<AppDbContext>(options =>
{
    options.UseSqlite(builder.Configuration.GetConnectionString("DefaultConnection"));
});

var app = builder.Build();

app.MapGet("/", async (AppDbContext db) => await db.Recipes.ToListAsync());

app.MapGet("/recipes/{id}", async (AppDbContext db, int id) =>
{
    var recipe = await db.Recipes.FindAsync(id);
    if (recipe is null)
        return Results.NotFound($"Recipe with ID {id} not found");
    return Results.Ok(recipe);
});

app.MapPost("/recipes", async (AppDbContext db, Recipe recipe) => {
    await db.Recipes.AddAsync(recipe);
    await db.SaveChangesAsync();
    return Results.Created($"/recipes/{recipe.Id}", recipe);
});

app.MapPut("/recipes/{id}", async (AppDbContext db, int id, Recipe recipe) => {
    var existingRecipe = await db.Recipes.FindAsync(id);

    if (existingRecipe == null)
        return Results.NotFound($"Recipe with ID {id} not found");
    existingRecipe.Name = recipe.Name;
    existingRecipe.Description = recipe.Description;

    await db.SaveChangesAsync();

   return Results.Ok(new { message = "Recipe successfully Updated" });
});

app.MapDelete("/recipes/{id}", async (AppDbContext db, int id) => {
    var recipe = await db.Recipes.FindAsync(id);
    if (recipe == null) return Results.NotFound($"Recipe with ID {id} not found");
    db.Recipes.Remove(recipe);
    await db.SaveChangesAsync();
    return Results.Ok(new { message = "Recipe successfully deleted" });
});

app.Run();
In the final part of our setup, we've created our API endpoints to interact with our Recipe data. Here, we've made use of the Dependency Injection (DI) feature provided by .NET. DI is a technique where an object receives other objects that it depends on, which allows for more efficient and modular code.
In our case, we've injected our AppDbContext into our endpoints. This allows us to perform operations like retrieving, adding, updating, and deleting recipes from our SQLite database. When a request is made to an endpoint, .NET takes care of creating an instance of AppDbContext and providing it to our method. This is what's happening when you see (AppDbContext db) in the parameters of the endpoint methods.
Before we conclude, let's look at how to test our endpoints using Postman. Postman allows us to send requests to our API and examine the responses. To test our API:
Open Postman and perform a get request. In this case, we are getting all recipes.
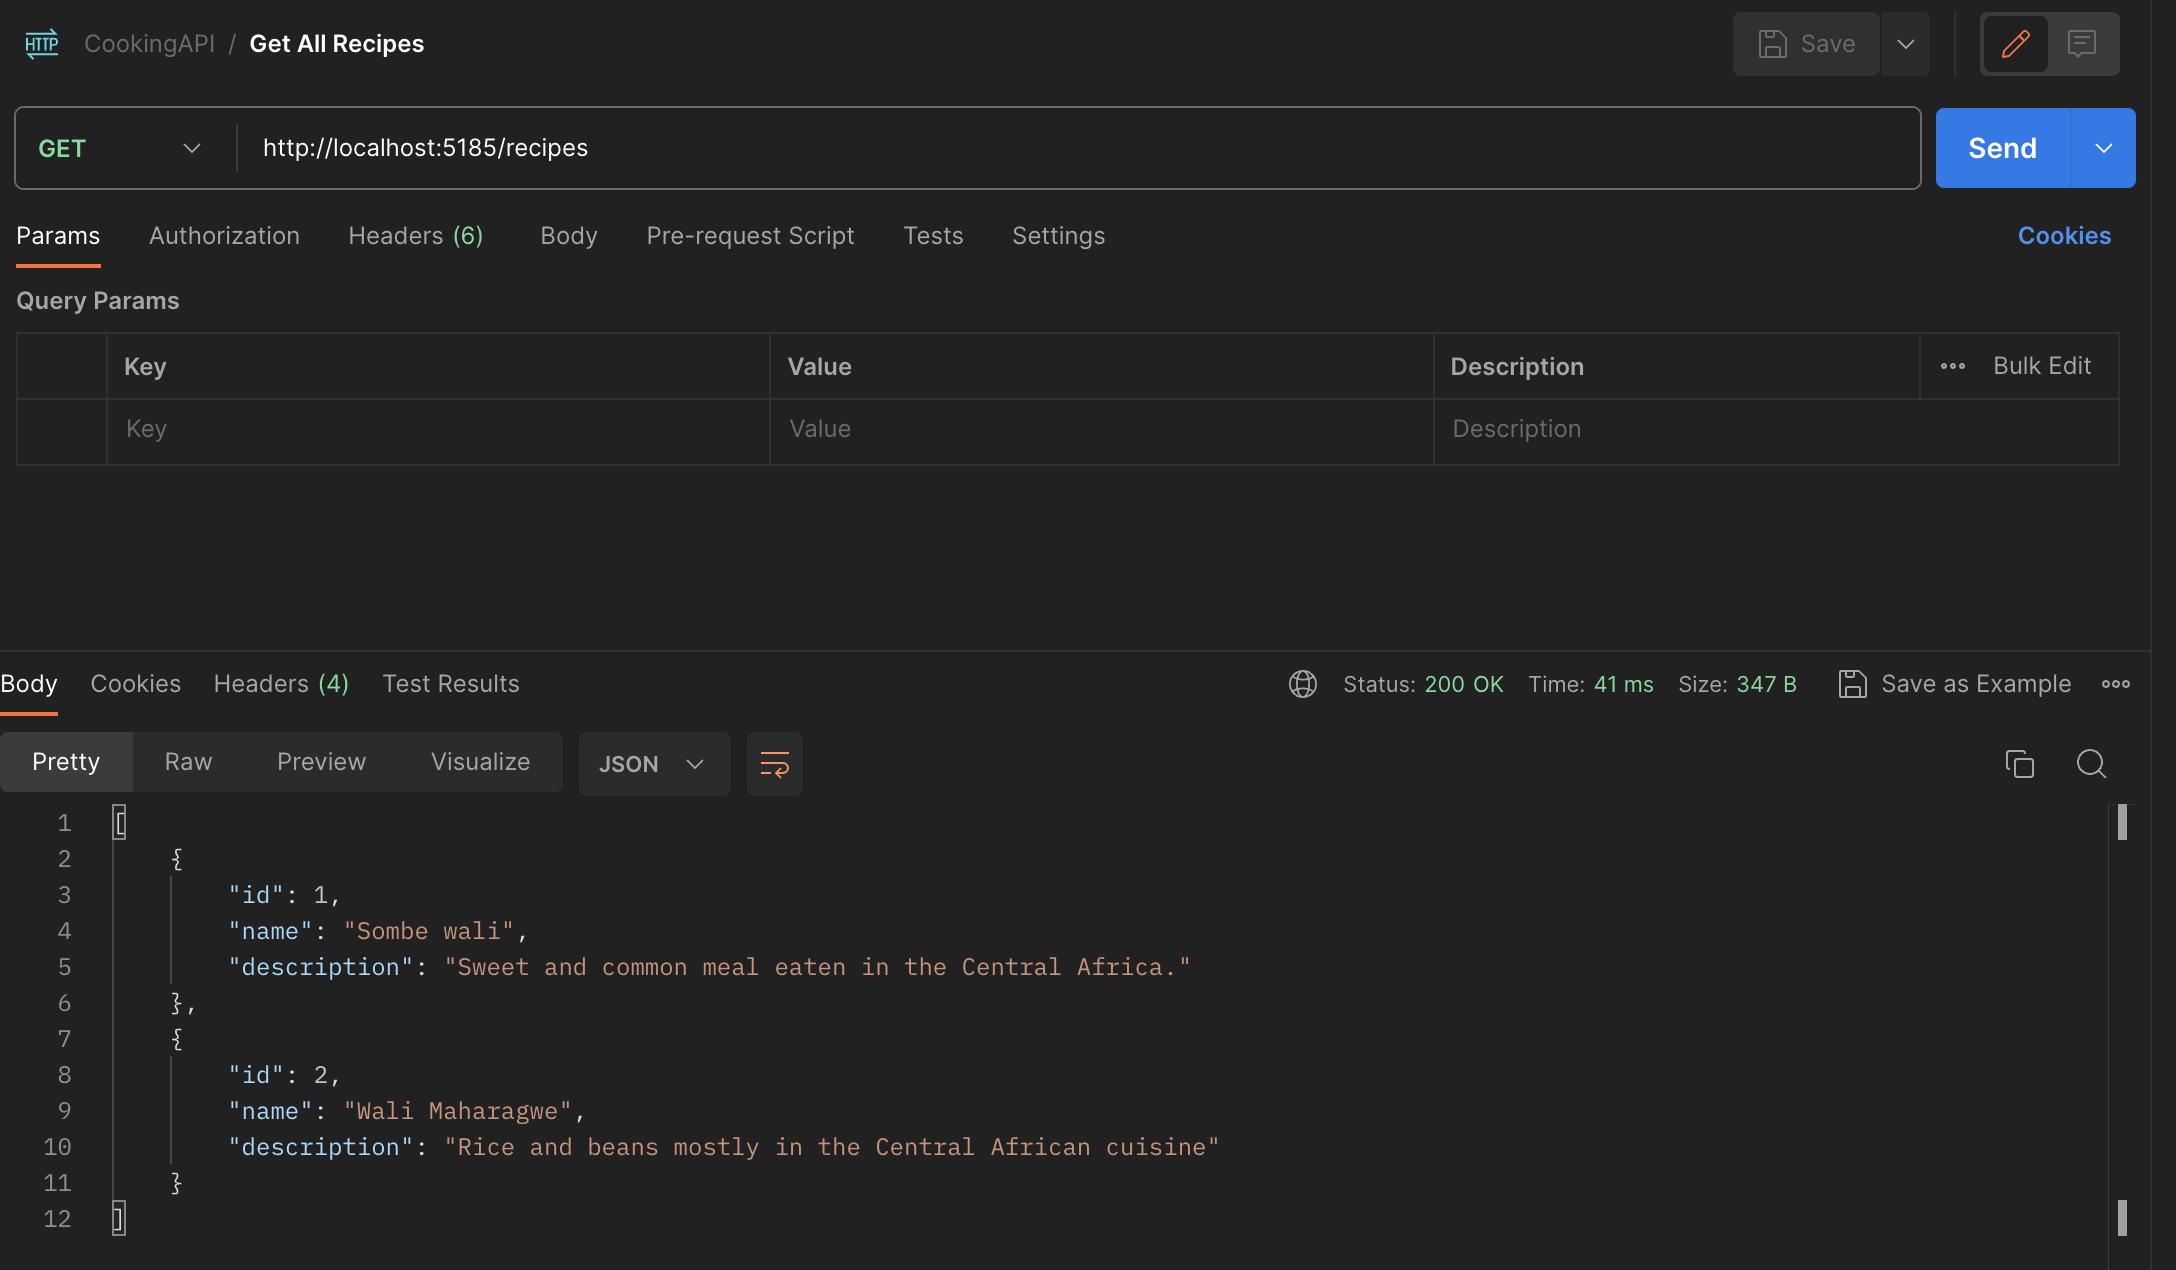
For simplicity, you can test the rest of the endpoints, and if something is not working as expected, feel free to drop it in the comment.
Conclusion
In this post, we've explored how to set up a Minimal API with SQLite and EF Core in .NET. We've covered everything from setting up the database, defining a model and a DbContext, and creating and testing API endpoints. We've also introduced the concept of Dependency Injection and how it's used in our application.
In the next article, we'll delve deeper into structuring our data access code by introducing the Repository pattern. This pattern helps to abstract the underlying data access implementation, leading to cleaner and more maintainable code.
Additionally, we'll explore how to integrate Swagger into our Minimal API. Swagger is an excellent tool for building, designing, and documenting RESTful APIs, and it will enable us to generate interactive API documentation automatically.
Stay tuned for these exciting topics! We'll continue to expand our API, applying best practices, and exploring powerful tools along the way. We'll also continue to touch on important software development concepts like Dependency Injection and how they're applied in real-world scenarios.